

Do Carrots Make Dogs Poop: Exploring the Effects of Carrots on Canine Digestion
Do Carrots Make Dogs Poop When it comes to our furry friends’ digestive health, a balanced diet is crucial. Many pet owners often wonder about the …
Read Article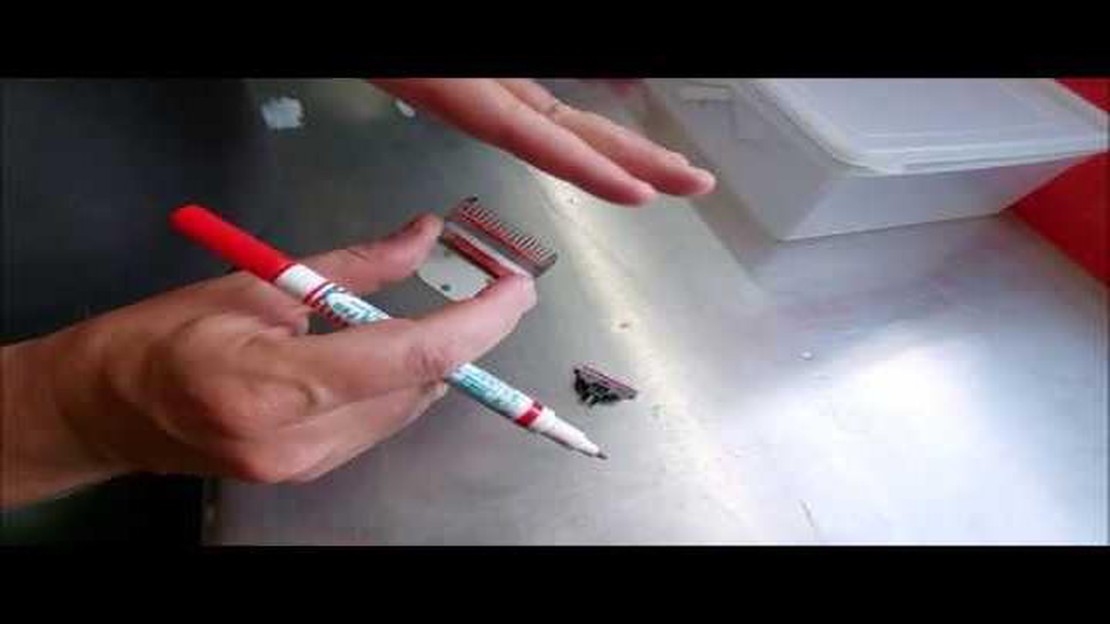
Keeping your dog’s fur in top condition requires regular grooming, and a crucial tool for this task is the dog clipper. Regular use can cause the blades to become dull, resulting in an inefficient and potentially painful grooming experience for your furry friend. Sharpening your dog clipper blades is a cost-effective alternative to buying new ones, and can help ensure a smooth, effective grooming session.
Before you get started, it’s important to gather the necessary supplies. You’ll need a small screwdriver, a cleaning brush, a sharpening stone or file, and some lubricating oil. Make sure to choose a sharpening stone or file that is specifically designed for dog clipper blades, as using the wrong tool can damage the blades.
The first step in sharpening your dog clipper blades is to remove them from the clippers. Most blades are held in place with screws, so use the small screwdriver to carefully unscrew them. Keep track of the screws to avoid losing them.
Once the blades are removed, use the cleaning brush to remove any hair or debris that may be caught between the teeth. This will help ensure a clean, effective sharpening process. After cleaning, inspect the blades for any signs of damage or wear that may require professional attention.
Next, it’s time to start sharpening the blades. If you’re using a sharpening stone, hold it at a slight angle and gently run the blades across the stone in a smooth, even motion. Be sure to sharpen both sides of each blade to maintain their balance. If using a file, hold it perpendicular to the blades and file in one direction along the cutting edge.
After sharpening, it’s important to lubricate the blades to prevent rust and ensure smooth operation. Apply a small amount of lubricating oil to the blades, making sure to cover the entire surface. Wipe away any excess oil with a clean cloth.
Finally, reassemble the blades onto the clippers, using the small screwdriver to tighten the screws. Make sure the blades are securely in place before you give them a test run. If they still seem dull or uneven, you may need to repeat the sharpening process or seek professional assistance.
Regularly sharpening your dog clipper blades will help prolong their lifespan and ensure a comfortable grooming experience for your four-legged friend. By following these step-by-step instructions, you can save money and keep your dog looking and feeling their best.
Keeping your dog’s clipper blades sharp is essential for maintaining a clean and effective grooming routine. Dull blades can pull on your dog’s fur, causing discomfort and potentially leading to skin irritations. Regularly sharpening your dog clipper blades will ensure a smooth and efficient trimming experience for both you and your furry friend.
Remember, properly sharpened clipper blades are essential for a comfortable and efficient grooming experience. By following these step-by-step instructions, you’ll be able to extend the lifespan of your blades and keep your furry friend looking their best.
Ensure that all the necessary tools are readily available before starting the process to make the sharpening process smoother and more efficient.
Before you start sharpening your dog clipper blades, it is important to properly prepare them. This will help ensure that you achieve the best sharpening results and that your blades will be in optimal condition for use on your furry friend.
Read Also: What Does Dog Sperm Look Like: A Comprehensive Guide
Here are the steps to follow when preparing your clipper blades:
By following these steps, you will ensure that your clipper blades are clean, in good condition, and ready for the sharpening process. This will help you achieve the best results when grooming your dog and ensure their comfort and safety during the process.
Before you can begin sharpening your dog clipper blades, you’ll need to disassemble them. Follow these steps to safely take apart your clipper blades:
By following these steps, you’ll be able to safely disassemble your clipper blades and prepare them for sharpening. Remember to handle the blades with care, as they are sharp and delicate.
Read Also: What You Need to Know About Gluten Allergy: Causes, Symptoms, and Treatment
Sharpening the clipper blades is important to maintain their effectiveness and ensure a smooth grooming experience for your dog. Here is a step-by-step guide to help you sharpen your dog clipper blades:
By following these steps, you can ensure that your dog clipper blades stay sharp and provide a comfortable grooming experience for your furry friend.
Once you have finished sharpening the dog clipper blades, follow these steps to properly reassemble them:
Once the clipper blades have been reassembled, it is important to test them before using them on your dog. It is recommended to use a small test patch on the dog’s fur to check the blade’s cutting efficiency.
Here’s how you can test the clipper blades:
If the clipper blades are cutting effectively and smoothly, you can proceed to groom your dog. However, if you notice any issues with the cutting performance, you may need to repeat the sharpening process or seek professional assistance.
Sharpening dog clipper blades is important because dull blades can cause discomfort and pain to your dog. They may also result in a less precise and uneven cut, making grooming more difficult.
The frequency of blade sharpening depends on how often you use the clippers and the quality of the blades. Generally, it is recommended to sharpen them every 3 to 6 months, or as soon as you notice a decline in performance.
Yes, you can sharpen dog clipper blades at home. There are various methods you can try, including using a sharpening stone, a honing solution, or a blade sharpening machine. However, it is important to follow the instructions carefully and exercise caution to avoid accidents.
Some signs that indicate your dog clipper blades may need sharpening include a decrease in cutting efficiency, an increase in cutting time, a louder or rougher sound when clipping, or when you notice the blades pulling or tugging on the hair instead of cutting it cleanly.
Yes, there are professional services available that specialize in sharpening dog clipper blades. These services have the expertise and equipment to ensure that your blades are sharpened correctly and are often a convenient option if you are not comfortable sharpening them yourself.
Do Carrots Make Dogs Poop When it comes to our furry friends’ digestive health, a balanced diet is crucial. Many pet owners often wonder about the …
Read Article
Can Dogs Use Human Heating Pads With the colder months approaching, many pet owners are wondering if their furry friends can benefit from the warmth …
Read Article
Dog The Bounty Hunter Marco Padilla Dog the Bounty Hunter Marco Padilla is a legendary figure in the world of bounty hunting. With his rugged …
Read Article
Pepto Bismol For Dogs With Parvo Are you a worried pet owner with a dog suffering from parvo? Look no further than Pepto Bismol! This handy …
Read Article
How Long To Wait Before Returning A Dog Bringing a dog into your home is a big responsibility. It requires time, effort, and commitment. However, …
Read Article
Doodle Dog Show Come and join us for the ultimate celebration of hybrid breeds at the annual Doodle Dog Show! Date: August 15, 2022 Table Of Contents …
Read Article


