


Dog House Name Ideas: Fun and Creative Names for Your Pet's Cozy Retreat
Dog House Name Are you struggling to find the perfect name for your dog’s house? Look no further! We’ve gathered a selection of fun and creative name …
Read Article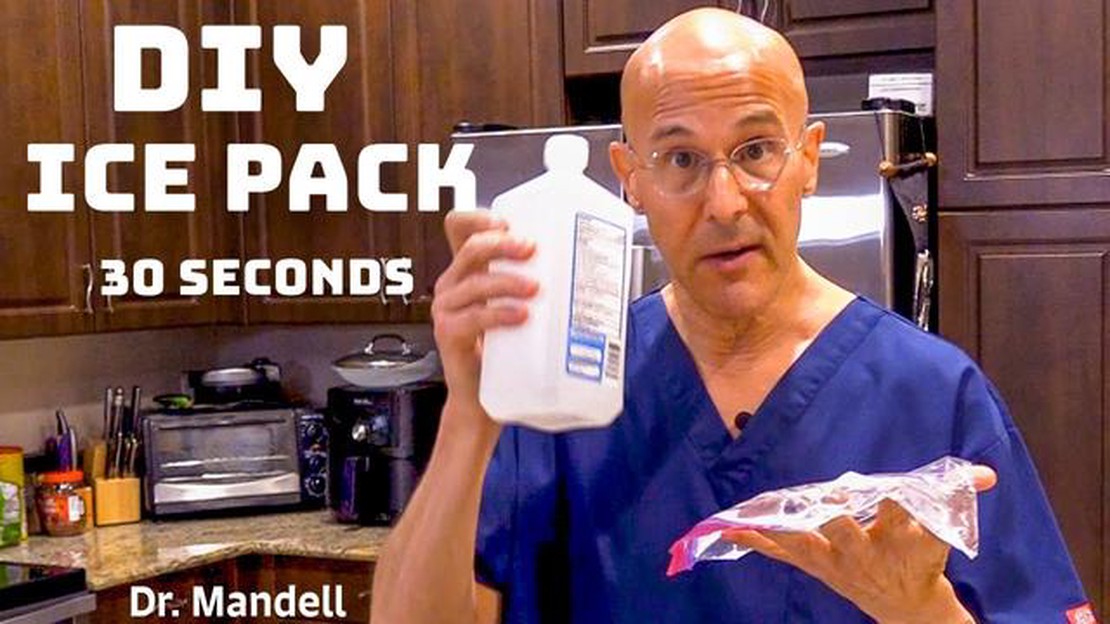
Are you looking for a quick and easy way to soothe muscle aches and pains? Look no further! With Dawn, you can create your own homemade ice pack in no time.
Why choose Dawn?
Dawn is a tried and trusted brand that has been helping families for years. With its powerful formula, it can effectively freeze water and keep it cold for hours, giving you the ultimate relief you need.
How does it work?
Making your own ice pack with Dawn is as easy as 1-2-3. Simply fill a ziplock bag with water, add a few drops of Dawn dish soap, and seal it tightly. Place the bag in the freezer for a few hours and voila! You now have your very own homemade ice pack ready to use.
Benefits of using a homemade ice pack
Using a homemade ice pack is not only cost-effective but also environmentally friendly. By reusing the same ziplock bag, you are reducing waste and doing your part for the planet. Plus, with Dawn’s high freezing point, your ice pack will stay colder for longer, providing you with long-lasting relief.
“I’ve tried many ice packs in the past, but nothing compares to the effectiveness and convenience of making my own with Dawn. It’s a game-changer!” - Sarah, satisfied customer
So why wait? Say goodbye to those pesky muscle aches and pains and create your homemade ice pack with Dawn today. Your body will thank you!
When it comes to soothing pain and reducing swelling, ice packs are a tried and true solution. While you can easily purchase pre-made ice packs from the store, there are several advantages to making your own homemade ice packs:
To make your own homemade ice pack, all you need is water, a sealable bag, and some dishwashing liquid like Dawn. By combining these ingredients, you can create a pliable and long-lasting ice pack that can be used for various injuries and ailments.
So why spend extra money on store-bought ice packs when you can easily make your own? Try making your homemade ice packs with Dawn and experience the benefits for yourself!
1. Highly Effective: Dawn dish soap is highly effective at freezing into a gel-like substance, making it an ideal ingredient for a homemade ice pack. It retains its shape and stays cold for a longer period of time, providing effective relief for pain and swelling.
2. Easy to Make: Creating a homemade ice pack with Dawn is quick and easy. All you need is Dawn dish soap, water, and a sturdy plastic bag. Simply mix the dish soap with water, pour it into the bag, and freeze. It’s a convenient and cost-effective solution for minor injuries and muscle strains.
3. Versatile: Dawn can be used to create different types of ice packs. You can use a small plastic bag for smaller injuries or a larger bag for larger areas of the body. It can also be shaped to conform to different body parts, providing targeted cold therapy.
4. Safe and Non-Toxic: Dawn dish soap is safe to use on the skin and is non-toxic. It does not contain any harsh chemicals that could irritate the skin or cause allergic reactions. This makes it a suitable option for people with sensitive skin or children.
5. Cost-effective: Making your own ice packs with Dawn is a cost-effective alternative to buying commercial packs. Dawn dish soap is an affordable product that can be found in most households. By using it to create your own ice packs, you can save money in the long run.
6. Environmentally Friendly: Using homemade ice packs with Dawn is an environmentally friendly choice. By reusing plastic bags and using a natural product like Dawn, you are reducing waste and minimizing the use of disposable ice packs.
How to Make a Homemade Ice Pack with Dawn
| Materials: | Instructions: | | * Dawn dish soap
Read Also: Can Dogs Have Freckles? Everything You Need to Know
Overall, using Dawn dish soap for homemade ice packs offers numerous benefits. Its effectiveness, ease of preparation, versatility, safety, cost-effectiveness, and environmental friendliness make it a great option for anyone in need of a quick and easy solution for pain and swelling.
Are you tired of spending money on store-bought ice packs? With just a few simple ingredients, you can make your own homemade ice pack using Dawn dish soap. Not only is it easy to make, but it’s also cost-effective and eco-friendly. Follow these steps to create your own reusable ice pack at home.
Read Also: Lime for Dog Poop: How to Use Lime to Eliminate and Prevent Dog Waste Odor
With this simple step-by-step guide, you can make your own effective and reusable ice pack using Dawn dish soap. Say goodbye to expensive store-bought ice packs and start saving money today with this homemade alternative. Give it a try and experience the benefits for yourself!
1. Ensure Proper Freezing: Before using your homemade ice pack, make sure it is properly frozen. Place it in the freezer for at least 2-3 hours or until it is completely frozen. This will ensure that it stays cold for an extended period of time.
2. Wrap in a Towel: When using the ice pack, always wrap it in a towel or cloth before applying it to your skin. This will prevent direct contact with the cold surface and help avoid any potential frostbite or skin irritation.
3. Apply for 10-20 Minutes: To get the most benefit from your homemade ice pack, apply it to the affected area for 10-20 minutes at a time. This will help reduce inflammation and provide relief from pain or swelling.
4. Use a Barrier: If you have sensitive skin, consider using a barrier, such as a layer of plastic wrap or a thin cloth, between your skin and the ice pack. This will provide an extra layer of protection and prevent any discomfort.
5. Alternate with Heat: Depending on the nature of your injury or pain, alternating between ice pack therapy and heat therapy can be beneficial. Heat can help relax muscles and increase blood flow, while ice can help reduce inflammation. Consult with a healthcare professional to determine the best approach for your specific condition.
6. Keep a Backup: It’s always a good idea to have a backup ice pack in case the one you are using loses its freezing temperature. Keep a spare ice pack in the freezer so you can easily switch them out if needed.
7. Reusable and Versatile: Homemade ice packs made with Dawn are not only cost-effective but also reusable and versatile. You can use them for various purposes, including relieving muscle soreness, reducing swelling from injuries, or soothing headaches and migraines.
8. Store Properly: After each use, make sure to store your homemade ice pack properly. Place it in a plastic bag or wrap it in plastic wrap before putting it back in the freezer. This will help prevent any contamination and keep it ready for the next use.
9. Use in First Aid Kit: Homemade ice packs can be a valuable addition to your first aid kit. They are easy to make, cost-effective, and can provide immediate relief in case of injuries or emergencies.
10. Check for Leaks: Regularly inspect your homemade ice pack for any signs of leaks or damage. If you notice any holes or tears, discard the ice pack and make a new one to ensure its effectiveness and safety.
Ingredients for Homemade Ice Pack with Dawn:
| - Dawn dish soap | | - Water | | - Ziploc bag |
To make your own homemade ice pack with Dawn, you will need a plastic resealable bag, Dawn dish soap, and water. Fill the bag ⅔ full with water and add a squirt of Dawn dish soap. Seal the bag tightly, removing as much air as possible, and place it in the freezer. Allow it to freeze for a few hours or overnight. Once frozen, the ice pack is ready to use.
To make a homemade ice pack with Dawn, you will need a plastic resealable bag, Dawn dish soap, and water.
The process of making a homemade ice pack with Dawn is simple. Fill a plastic resealable bag ⅔ full with water and add a squirt of Dawn dish soap. Seal the bag tightly, removing as much air as possible, and place it in the freezer. Allow it to freeze for a few hours or overnight. Once frozen, the ice pack is ready to use.
It typically takes a few hours or overnight for a homemade ice pack with Dawn to freeze. The exact freezing time may vary depending on the temperature of your freezer.
Yes, you can reuse a homemade ice pack with Dawn. Simply place it back in the freezer after each use to refreeze. You may need to add more water or Dawn dish soap if the mixture evaporates or gets used up over time.
While it is recommended to use Dawn dish soap, you can potentially use any dish soap to make a homemade ice pack. However, keep in mind that some dish soaps may have different formulations and may not freeze or maintain the same consistency as Dawn.
Dog House Name Are you struggling to find the perfect name for your dog’s house? Look no further! We’ve gathered a selection of fun and creative name …
Read Article
How Much Xanax Can You Give A 50lb Dog Xanax is a commonly prescribed medication for humans to treat anxiety and panic disorders. But what about our …
Read Article
How Much Olive Oil For Dog Constipation If your furry friend is experiencing constipation, you may be wondering how you can help alleviate their …
Read Article
Dog Wagging Tail While Barking Dogs have long been known as man’s best friend, but sometimes their behaviors can be a bit perplexing. One such …
Read Article
Dog Hair In Human Eye Dogs bring joy and companionship to our lives, but sometimes they can also bring some unexpected problems. One of the most …
Read Article
What Dogs Are Banned In South Korea In South Korea, there is a list of dog breeds that are currently banned. These breeds are considered dangerous or …
Read Article


