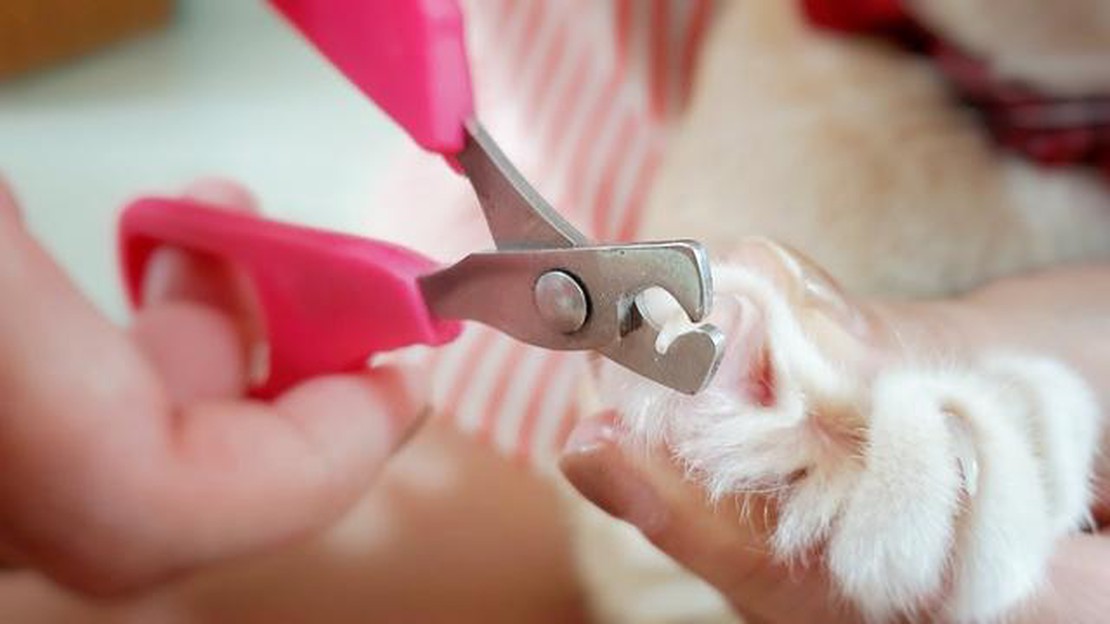
Keeping your dog’s nails trimmed is an important part of their overall health and well-being. Overgrown nails can be uncomfortable for your furry friend and may even lead to health issues. That’s why it’s essential to have a pair of sharp dog nail clippers at your disposal.
If you’ve noticed that your dog’s nail clippers are becoming dull and ineffective, it’s time to learn how to sharpen them. With our step-by-step guide, you’ll have your clippers back to their original cutting abilities in no time.
Table Of Contents
Step 1: Gather Your Supplies
To begin, gather the necessary supplies:
Sharpening stone or file
Protective gloves
Old towel or cloth
Step 2: Prepare the Clippers
Start by cleaning the clippers to remove any dirt or debris. You can use a cloth or old toothbrush for this step. Once the clippers are clean, dry them thoroughly with a towel.
Step 3: Sharpen the Cutting Edges
Put on your protective gloves to ensure your safety while sharpening the clippers. Hold the clippers firmly and position the sharpening stone or file at a 45-degree angle against one of the cutting edges. Move the stone or file in a circular motion along the edge, applying light pressure. Repeat this process several times until the edge feels sharper.
Step 4: Test the Clippers
After sharpening, test the clippers on a small piece of paper or cardboard. If they cut through smoothly and cleanly, they are ready to use. If not, repeat the sharpening process until the desired cutting ability is achieved.
Tip: Regularly cleaning and sharpening your dog nail clippers will help maintain their performance and keep your dog comfortable during the nail trimming process.
By following this step-by-step guide, you’ll be able to sharpen your dog nail clippers effectively and ensure that your furry friend’s nails are always well-maintained. Happy grooming!
Why Sharpening Dog Nail Clippers is Important
Dog nail clippers are an essential tool for maintaining your pet’s overall health and well-being. Regularly trimming your dog’s nails helps prevent them from becoming overgrown, which can lead to discomfort and pain for your furry friend. However, it’s not enough to simply have a pair of nail clippers on hand – they need to be properly sharpened in order to be effective.
Here are several reasons why sharpening your dog nail clippers is important:
Efficiency: Sharpening your dog nail clippers ensures that they cut cleanly and precisely. Dull clippers can cause nails to split or splinter, leading to pain and potential injury for your dog.
Comfort: Properly sharpened clippers provide a smoother and more comfortable experience for your pet. By reducing the risk of painful cuts or pinches, you can make the nail trimming process less stressful for both of you.
Accuracy: Sharp clippers allow you to trim your dog’s nails with better precision, keeping them at the appropriate length. This is especially important for dogs with dark nails, where it can be difficult to see the quick (the sensitive portion of the nail).
Longevity: Regularly sharpening your dog nail clippers helps extend their lifespan. Dull blades can put additional strain on the clippers, causing them to wear out more quickly and potentially break.
Sharpening your dog nail clippers is a simple but important task that should be included in your regular grooming routine. By taking the time to keep your clippers sharp, you can ensure an efficient, comfortable, and precise nail trimming experience for both you and your beloved pet.
Before you begin sharpening your dog nail clippers, make sure you have all the necessary tools ready. Having everything prepared in advance will make the process smoother and more efficient.
Nail clippers: Ensure you have a good quality pair of dog nail clippers. It’s important to choose clippers that are sharp and designed specifically for cutting dog nails.
Sharpening stone or file: To sharpen the blades of your nail clippers, you will need either a sharpening stone or file. These tools help to restore the sharpness of the blades, ensuring a clean and precise cut.
Cotton swabs or soft cloth: You will need cotton swabs or a soft cloth to clean the nail clippers before and after sharpening. This will remove any dirt or debris, and ensure the clippers are hygienic for your dog.
Optional: Lubricating oil: Lubricating oil can be used to keep the nail clippers in good condition and prevent rusting. It’s not mandatory, but can be beneficial for prolonging the lifespan of your clippers.
Having these tools readily available will make the process of sharpening your dog nail clippers much easier. Once you have gathered all the necessary tools, you are ready to move on to the next step.
What You Will Need
Dog nail clippers: Make sure you have a reliable and sturdy pair of dog nail clippers. Look for ones that are sharp and durable.
Nail file or emery board: This will be used to smooth out any rough edges after you have clipped your dog’s nails.
Dog treats: Having some delicious treats on hand will help to distract and reward your dog during the nail clipping process.
Well-lit area: Find a spot in your home that has plenty of light, so you can see what you are doing and avoid cutting your dog’s nails too short.
Towel: Use a towel to keep your dog comfortable and secure during the nail clipping process. This will also help to catch any nail clippings.
Styptic powder: In case you accidentally cut your dog’s nails too short and they start bleeding, having styptic powder on hand can help stop the bleeding.
Step 2: Prepare Your Dog
Before you start the nail clipping process, it’s important to prepare your dog. This will help ensure a safe and stress-free experience for both you and your furry friend.
Gather your supplies: Make sure you have all the necessary supplies handy, including a pair of sharp dog nail clippers, styptic powder (to stop bleeding in case of accidental cuts), and treats or rewards for your dog.
Find a quiet and comfortable space: Choose a quiet and well-lit area where you and your dog can both relax. You may want to use a non-slip surface or a mat to help keep your dog steady during the process.
Get your dog into a calm state: Before you start trimming the nails, try to calm your dog down by petting them, giving them treats, or engaging in some gentle play. This will help your dog feel more relaxed and cooperative.
Handle your dog’s paws: Start by gently touching and handling your dog’s paws on a regular basis to get them used to the sensation. This will help them become more comfortable during the nail clipping process.
Introduce the clippers to your dog: Show your dog the clippers and let them sniff and investigate them. This will help them become familiar with the tool and reduce any fear or anxiety they may have.
Practice the handling: Practicing the handling of your dog’s paws and nails without actually cutting them can help desensitize them to the process. Gently hold their paw, touch their nails, and reward them for cooperating.
By following these steps to prepare your dog, you can help make the nail clipping process a positive experience for both you and your four-legged companion.
Making Your Dog Comfortable
When it comes to grooming your dog, it’s important to make sure they are comfortable and relaxed. Here are a few tips to help make the process easier for both you and your furry friend:
Choose a quiet and calm environment: Find a quiet area in your home where you can groom your dog without any distractions. This will help them feel more at ease and make the process less stressful.
Use treats and positive reinforcement: Reward your dog with treats and praise during the grooming process. This will not only help them associate grooming with positive experiences, but it can also help distract them from any discomfort they may feel.
Take breaks: If your dog starts to get anxious or agitated, it’s important to take breaks. Give them some time to relax and then continue with the grooming process when they are calm again.
Be gentle: Handle your dog’s paws and nails with care. Use a gentle touch when trimming their nails and avoid applying too much pressure. This will help prevent any pain or discomfort.
Use a comfortable position: Find a comfortable position for both you and your dog during the nail trimming process. Some dogs may prefer to lie down, while others may be more comfortable sitting or standing.
By following these tips, you can help make the grooming process a positive experience for your dog. Remember, it’s important to be patient and understanding with your furry friend and always prioritize their comfort and well-being.
Step 3: Sharpening the Clippers
Properly sharpened nail clippers are essential for a safe and effective grooming session for your dog. Follow these steps to ensure your clippers are sharp and ready:
Gather the necessary tools: Before starting the sharpening process, make sure you have the following items: a sharpening stone, some water, and a cloth.
Prepare the sharpening stone: Wet the sharpening stone with water and place it on a flat surface. This will help to prevent excessive heat and ensure a smooth sharpening process.
Sharpen the clippers: Hold the clippers firmly in your hand and place the blade flat against the sharpening stone. Gently move the clippers back and forth across the stone, maintaining a consistent angle. Repeat this process several times until the blade feels sharp.
Check the blade: After sharpening, carefully wipe away any residue or debris from the clippers using a cloth. Inspect the blade to ensure it is smooth and sharp. If necessary, repeat the sharpening process for any dull areas.
Test the clippers: Before using the clippers on your dog’s nails, test them on a piece of paper or a soft material. If the clippers easily cut through the material, they are ready to use.
By regularly sharpening your dog nail clippers, you can ensure that they are always ready for use. Remember to use caution and take your time when sharpening to avoid any accidents or injuries. Happy grooming!
Using the Right Techniques
When it comes to sharpening dog nail clippers, using the right techniques is crucial. Here are some steps to follow:
Gather your tools: Before you begin, make sure you have a nail file or grinder, a pair of sharp scissors or clippers, and a styptic powder or cornstarch to help stop bleeding in case of any accidents.
Prep your dog: Find a quiet and comfortable area to work in. Make sure your dog is calm and relaxed. You may want to have treats or toys nearby to help keep them distracted and cooperative.
Inspect the clippers: Before sharpening, examine the condition of your clippers. If they are rusty, damaged, or have dull blades, it may be time to invest in a new pair.
Sharpen the blades: Use a sharpening stone or file to gently sharpen the blades of your clippers. Follow the manufacturer’s guidelines for the specific type of clippers you have.
Test the sharpness: After sharpening, test the sharpness of the clippers by making a small cut on a thin piece of paper. The blades should easily slice through the paper without tearing or fraying it.
Trim your dog’s nails: Once your clippers are sharp, it’s time to trim your dog’s nails. Make sure to only cut the tips of the nails and avoid cutting into the quick, which can cause pain and bleeding. Take frequent breaks and reward your dog with treats and praise to keep them calm and cooperative.
Finish up: After trimming, use the nail file or grinder to smooth any rough edges or sharp points. This will help prevent snags or scratches. If you accidentally cut into the quick and your dog’s nail begins to bleed, apply a small amount of styptic powder or cornstarch to stop the bleeding.
Remember, always use caution and go slow. If you’re unsure or uncomfortable with the process, it’s best to consult a professional groomer or veterinarian for assistance.
FAQ:
What is the best way to sharpen dog nail clippers?
The best way to sharpen dog nail clippers is by using a sharpening stone or a nail file. Hold the clippers at a 45-degree angle and gently slide the stone or file along the cutting edge of the blade. Repeat the process until the blades are sharp enough to cut through the dog’s nails.
Can I use a regular nail file to sharpen dog nail clippers?
Yes, you can use a regular nail file to sharpen dog nail clippers. Make sure to hold the clippers at a 45-degree angle and gently file along the cutting edge of the blade. Repeat the process until the blades are sharp enough to cut through the dog’s nails.
Is it necessary to sharpen dog nail clippers regularly?
Yes, it is necessary to sharpen dog nail clippers regularly. Dull clippers can cause discomfort and pain to your dog while trimming their nails. Sharpening the clippers will ensure a clean and precise cut, making the process much easier and more comfortable for both you and your dog.
What can I do if I don’t have a sharpening stone or nail file?
If you don’t have a sharpening stone or nail file, you can also use a piece of sandpaper or emery cloth to sharpen the dog nail clippers. Hold the clippers at a 45-degree angle and gently rub the sandpaper or emery cloth along the cutting edge of the blade. Repeat the process until the blades are sharp enough to cut through the dog’s nails.
Can I Put Socks On My Dog To Stop Scratching If you have a dog that constantly scratches, you might be wondering if using socks can help prevent this …
Can You Mow Over Dog Poop For many pet owners, keeping the yard clean and tidy is an ongoing challenge. One of the biggest frustrations can be dealing …
Can Dogs Eat Fast Food When it comes to feeding dogs, it’s important to understand what foods are safe for them to consume. Many pet owners may wonder …
Can Dogs Have Pecan Pie Dog owners often find themselves wondering if they can share their favorite desserts with their furry companions. Pecan pie, a …